Power edging to create a clean edge along the driveway. This will separate the sod away from the asphalt, making it possible to easily access the edge of the asphalt.
Step 2
Fine trimming will reach all the hard to get places. This will be completed with a power trimmer.
Step 3
Our next step would be to power sweep using a poly-wire mixed broom. This will rid most of the dirt and excess debris off the asphalt, as well as etch the surface for better bonding of the sealer.
Step 4
To fully cleanse the asphalt we will then take our hydraulic driven power rotary broom, equipped with steel bristles, to grind out all the moss, algae, and stubborn debris.
Step 5
Once again we will take our power sweeper and this time cover the entire area of the asphalt, to best optimize bondage between asphalt and sealer.
Step 6
To purge all the dirt and grime that has been uncovered, a push behind power blower, with 235 MPH moving CFM, will complete the job.
Step 7
A rubber emulsion mix is used as a crack filler. This will ensure that all cracks are sealed tight, preventing water from getting under your asphalt. Not only that, but it will also keep the ground from eroding, which would cause your asphalt to deteriorate prematurely (fall apart).
Step 8
It is now time to begin sealing. For the first coat we would start with a bristle brush to work in the sealer, filling all the crevasses and carefully coating the edges.
Step 9
If necessary to apply a second coat, it will be done with either a squeegee or spray. This last coat would be to guarantee longer lasting effects, to completely fill all craters, and leave a nice, visually pleasing finish.
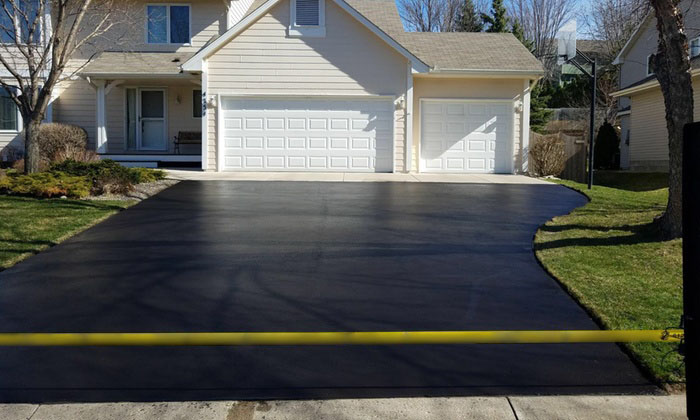
Step 10
Last but not least, a blockade would surround all sealed areas. Warning others to be careful and allow the asphalt an appropriate amount of time to dry and cure.
Step 1
Power edging to create a clean edge along the driveway. This will separate the sod away from the asphalt, making it possible to easily access the edge of the asphalt.
Step 2
Fine trimming will reach all the hard to get places. This will be completed with a power trimmer.
Step 3
Our next step would be to power sweep using a poly-wire mixed broom. This will rid most of the dirt and excess debris off the asphalt, as well as etch the surface for better bonding of the sealer.
Step 4
To fully cleanse the asphalt we will then take our hydraulic driven power rotary broom, equipped with steel bristles, to grind out all the moss, algae, and stubborn debris.
Step 5
Once again we will take our power sweeper and this time cover the entire area of the asphalt, to best optimize bondage between asphalt and sealer.
Step 6
To purge all the dirt and grime that has been uncovered, a push behind power blower, with 235 MPH moving CFM, will complete the job.
Step 7
A rubber emulsion mix is used as a crack filler. This will ensure that all cracks are sealed tight, preventing water from getting under your asphalt. Not only that, but it will also keep the ground from eroding, which would cause your asphalt to deteriorate prematurely (fall apart).
Step 8
It is now time to begin sealing. For the first coat we would start with a bristle brush to work in the sealer, filling all the crevasses and carefully coating the edges.
Step 9
If necessary to apply a second coat, it will be done with either a squeegee or spray. This last coat would be to guarantee longer lasting effects, to completely fill all craters, and leave a nice, visually pleasing finish.
Step 10
Last but not least, a blockade would surround all sealed areas. Warning others to be careful and allow the asphalt an appropriate amount of time to dry and cure.